Designs by Jami
Cheer Sport Side Bow - applique & design.
Cheer Sport Side Bow - applique & design.
Couldn't load pickup availability
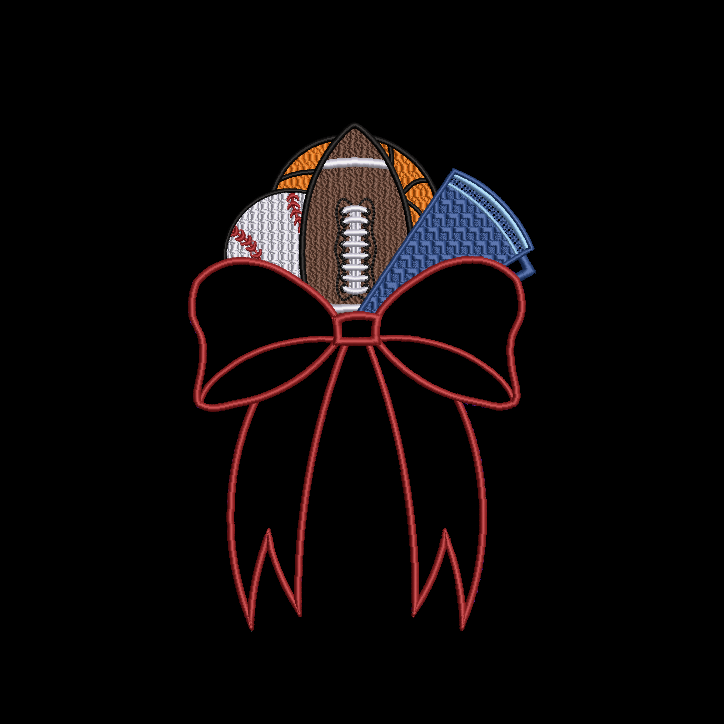
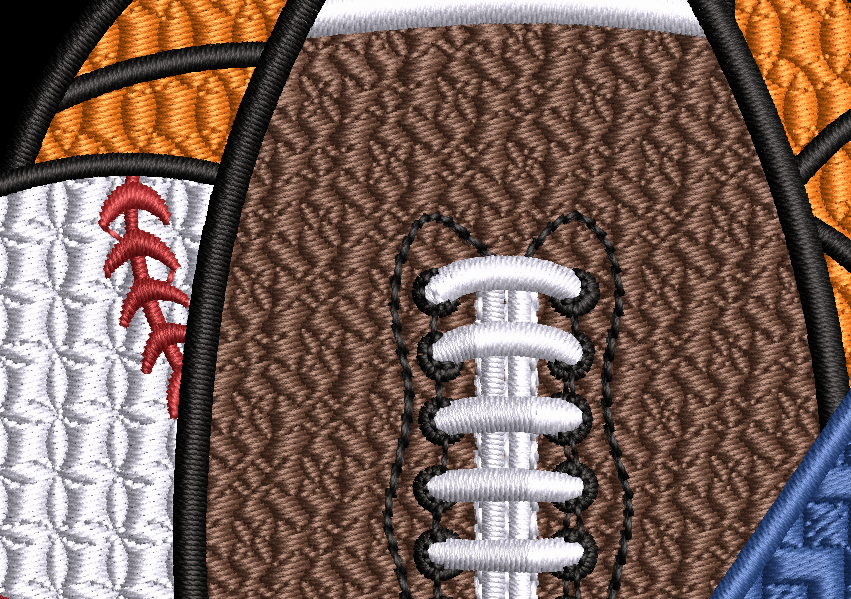
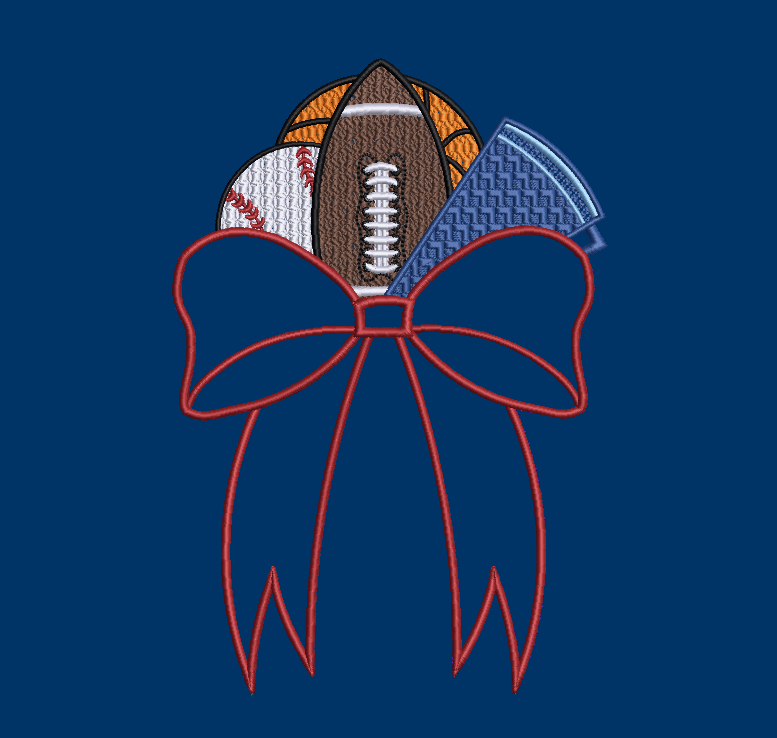
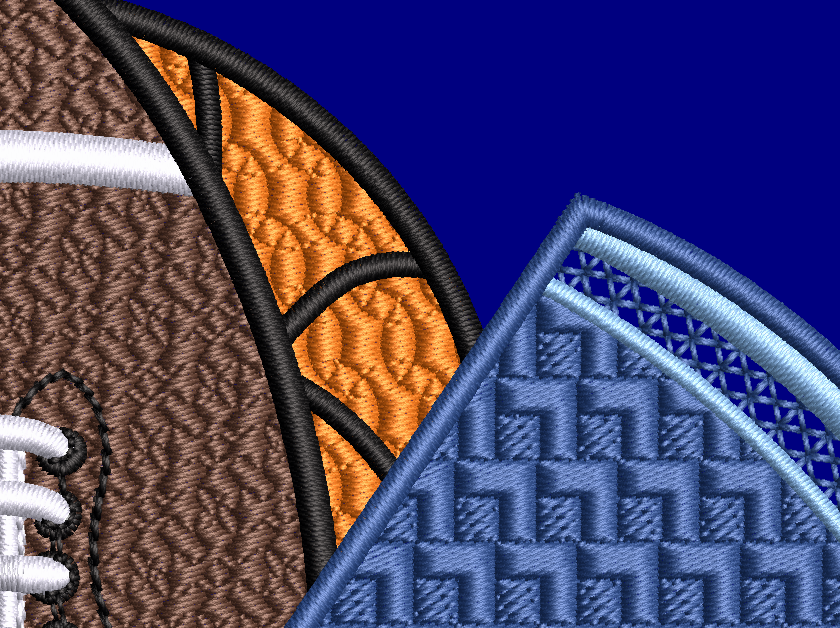
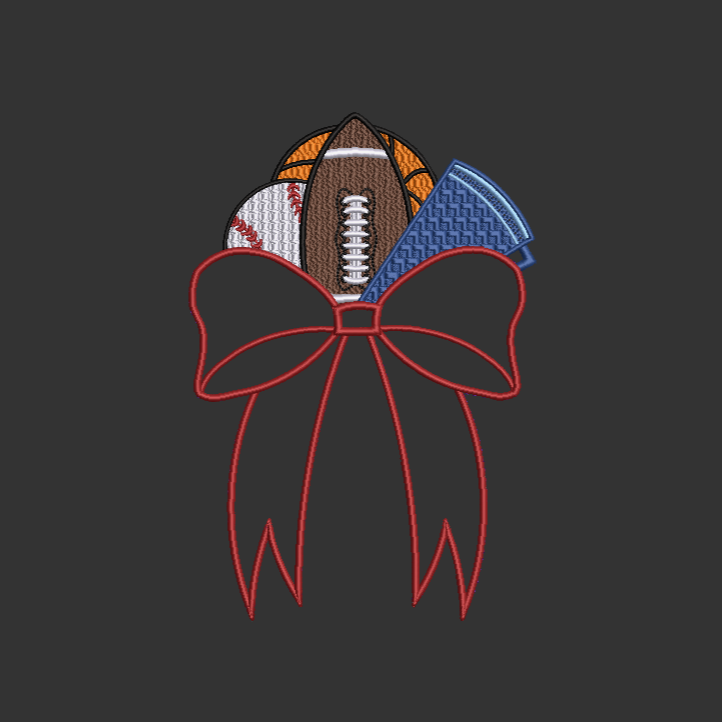
Gorgeous side bow created by request, showing off baseball, basketball, football and cheer cone - all wrapped in a beautiful red satin (stitch) bow!
Cutting Files Included!
Upgrade your embroidery game with our newest trend - side bows! This Listing includes a baseball, basketball, football and cheer cone all wrapped in a gorgeous satin bow. Custom Request! Perfect for sports enthusiasts and crafters alike.
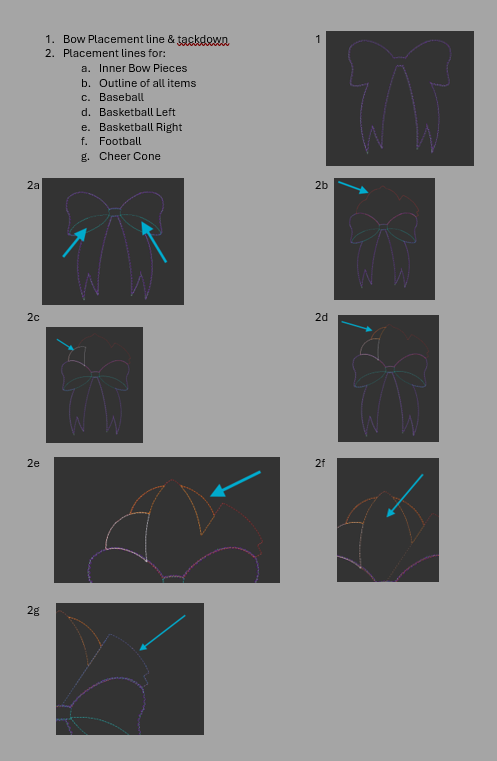
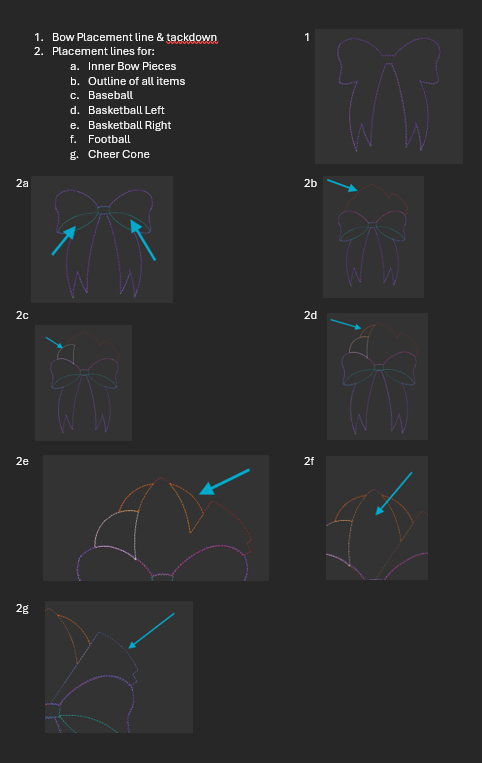
Comes with design worksheets, cutting files, instructions, illustrations, an applique only version of the design and the standard design!
Custom Design for Machine Embroidery. All designs are created to be used on an embroidery machine. You must have a method to transfer files to your machine to use. NOT a physical item; you will need to embroider and stitch your design on any shirt or fabric you choose. You will receive your designs in an instant download after your order is confirmed and comes in the following formats: dst, exp, pes, pec, vp3, vip, hus, xxx, jef, jpx, emd, csd, pcm (4x4 hoops only), pcq, pcd, pcs, and shv.
CUTTING FILES INCLUDED! Illustrations and design worksheets included.
You can skip any of the applique runs you need - design worksheet will show you where the stops are if you want to skip.
Sports and Cheer Wrapped in Side Bow Design Information:
Metric (MM): W 151.46 x H 221.56
US (IN): W 5.96 x H 8.72
Stitch Count (SC): 37,555
Sports and Cheer Wrapped in Side Bow Appliques Design Information:
Metric (MM): W 151.46 x H 221.56
US (IN): W 5.96 x H 8.72
Stitch Count (SC): 19,018
Steps
1. Remove band of your sweatshirt if doing so, by cutting in between the two seams that attach it. You can do it either way – without the band will make it easier for your machine as well as you; preference is up to you.
2. Mark your side seam centers with embroidery/sewing chalk/pen.
3.Stitch your placement line on your embroidery machine. I HAVE TWO PLACEMENT LINES – first runs over entire design – do this only on your stabilizer so you know where entire design is. *Rotate your design upside down so the bulk of your sweatshirt will fall in front of your machine (not in back where there is less room)
4. Hoop one of the sides or prep your float. If you have a hoop master, this will make quick work of this.
5. Load your hoop on your machine.
6. Run the trace feature to see where your design will stitch at to be sure it is lined up correctly.
7. Once lined up, stitch the tack down for first section.
8. Using your applique scissors, remove excess.
9. Continue for each section of the applique.
10. Cut the sweatshirt up the middle of the bow & then run through for final satin stitching.
11. Repeat to other side of sweatshirt.
Cut center of sweatshirt between legs & clean
Repeat to other side
Hoop Sizing
Hoop Sizing